|
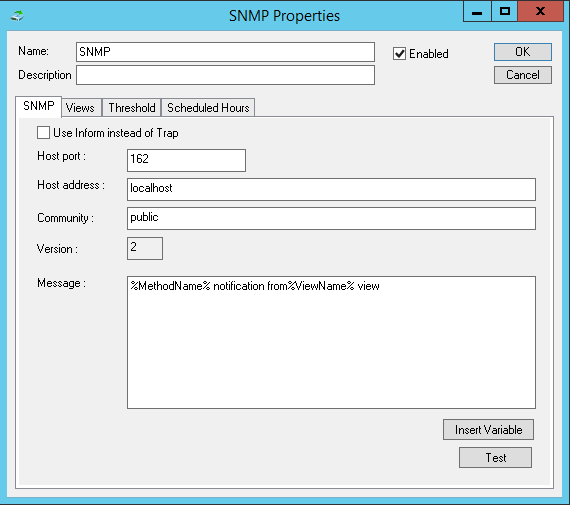
ELM supports SNMPv1, SNMPv2c, and SNMPv3 traps as notification types.
SNMP Trap
The SNMP Trap Notification sends event information as an SNMP Trap to an SNMP management system. An ELM MIB is provided in the MibFiles folder under the ELM Server installation folder. It is used by the SNMP management system to translate the SNMP Trap.

Click the Test button to test the trap generation and settings.
Threshold
Thresholds determine how many times identical events can occur before the Notification Method will be executed, or stopped from executing. There are three threshold settings available:
•Disable this notification when it is triggered. If the Notification Method is triggered the configured number of times within the specified time period, the notifications will stop. The Notification Method is then re-enabled after a specified time period. •Activate this notification method after it is triggered. When this threshold is selected, the notifications will not be processed unless the option is triggered the specified number of times within the time period selected. •Consolidate notifications by waiting until either: •A specific number of similar events has occurred •A specific amount of time has elapsed To disable this Notification Method for older data sent from a Service Agent, check the box that says 'Disable this notification method for old data (Default 60 minutes).'. By default, 60 minutes is the window of time which differentiates old data from new data. If an event occurred within the last hour, even though it may be from a Service Agent cache file, ELM will not treat it as old data. This feature is designed to account for, and notify you of, events that occur during brief ELM Server outages (reboots, service restart, etc.). This window of time can be changed by setting the HKEY_LOCAL_MACHINE\SOFTWARE\TNT Software\ELM Enterprise Manager\7\Settings\CacheDataTrigger value in the Registry on the ELM Server.
Threshold Events Counter
The threshold count increments only for identical events; that is, events that have the same four fields:
•Computer Name •Source •User Name •Event ID For example, if you configure a SMTP Notification Method with the Threshold set to Disable when triggered 2 times within 5 minutes, and re-enable after 30 minutes, and within a 5 minute period the following events are received triggering this Notification Method:
•Computer: SERVERA •Source: Perflib •Event ID: 1003 •User Name: None •Category: None •Type: Warning Time •Generated: 4/10/2011 1:34:58 PM •Log: Application •Message: Performance data cannot be collected.
•Computer: SERVERA •Source: Perflib •Event ID: 1003 •User Name: None •Category: None •Type: Warning •Time Generated: 4/10/2011 1:36:04 PM •Log: Application •Message: Performance data cannot be collected. Then because the four fields match, the events increment the count. Because two identical events occurred within the defined 5 minute period, the Notification Method will be disabled for additional matching events for 30 minutes, and automatically re-enabled thereafter. While the Notification Method is disabled for one group of events, it will send notifications for other (non-matching) events unless they also reach the threshold. The threshold count would not be incremented if the second event looked like this:
•Computer: SERVERB •Source: Perflib •Event ID: 1003 •User Name: None •Category: None •Type: Warning •Time Generated: 4/10/2011 1:34:58 PM •Log: Application •Message: Performance data cannot be collected. Because the Computer name is different in the above event, it is not considered an identical event, and therefore does not increment the threshold count for the first event (and thus does not disable the Notification Method).
Scheduled Hours
The Schedule setting for this Notification. The Schedule allows you to control when the Notification is run.
Select the times that this Notification is active. By default, the schedule is set to ON for all hours and all days. Mouse clicks toggle each time period ON and OFF. Clicking on an individual square will toggle the active schedule for that hour. Clicking on an hour at the top of the grid, or on a day of the week at the left of the grid will toggle the entire column or row. Keyboard equivalents are the arrow keys and the space bar.
|  Previous
Next
 Previous
Next