|
The ELM Server includes the ELM Control Panel applet, which appears in the Windows Control Panel. To access it, open Control Panel and choose the ELM Enterprise Manager applet. In addition, the control panel can be found in the ELM program group on the Windows Start menu.
Note
For Windows 2003/2008/2012 64bit systems, in the control panel, the ELM applet is located under the "View x86 Control Panel Icons".
It contains the following tabs:
Database
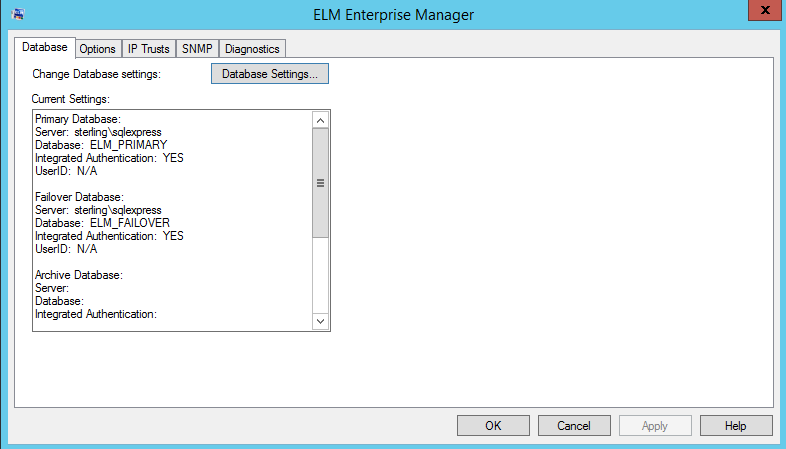
This tab displays the current database settings and also allows access to the database Settings Wizard for reconfiguration.
Options
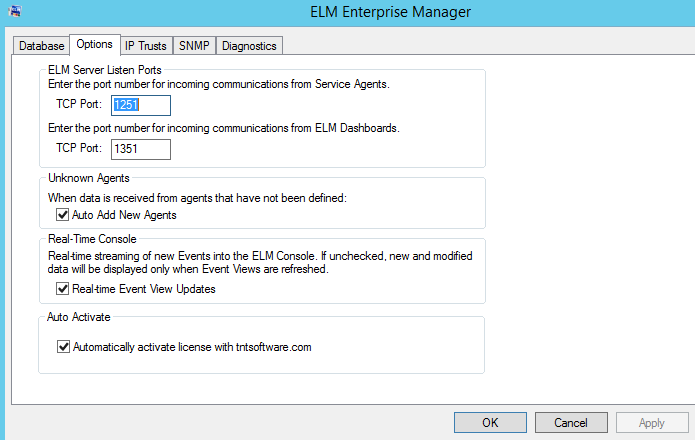
ELM Server Listen Port - Enter the port number on which the ELM Server listens. By default, an ELM Server will listen on port 1251.
ELM Dashboard Listen Port - Enter the port number on which the ELM Dashboard listens. By default, an ELM Dashboard will listen on port 1351.
Unknown Agents - Enables the ELM Server to automatically add systems that send data to the ELM Server (e.g., Syslog messages, SNMP traps, etc.), provided there are licenses available. By default, this checkbox is checked. If you do not want systems that send data to the ELM Server to be automatically added as Agents, uncheck this box.
Note
For auto add to work, an appropriate Syslog or SNMP receiver monitor item needs to be assigned. If there's no receiver, the ELM Server isn't listening for incoming traffic. For example, unless there's an SNMP Receiver monitor item created, regardless of this option being checked, an agent won't be created if a trap is sent to the ELM Server.
Real-Time Console - Toggle the streaming of new events from the ELM Server to the ELM Console on and off. When this checkbox is unchecked, Event Views in the ELM Console are database driven and must be manually refreshed in order to display data. When this checked, events stream into and are displayed in the ELM Console as they are received by the ELM Server.
Auto Activate - Toggle the auto activation of the ELM server with tntsofware.com. This keeps support expiration and license counts up to date without intervention.
IP Trusts
Forward Events
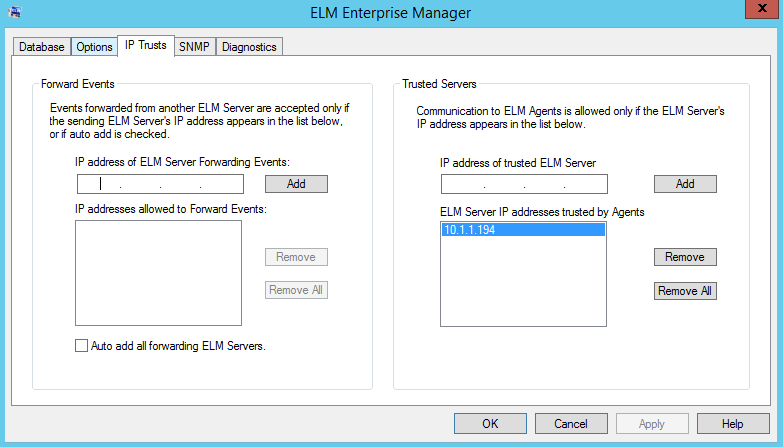
ELM has the functionality to forward events to another ELM Server using a Forward Event Notification Method.
Events forwarded from another ELM Server are accepted only if the sending ELM Server's IP Address is listed. Individual IP's can be enter or the check box to Auto Add all forwarding ELM servers can be selected.
Trusted Servers
This setting affects which ELM servers the agents will send/receive data. This may be used during a ELM server migration so the agents will trust the new ELM server for configuration changes.
SNMP
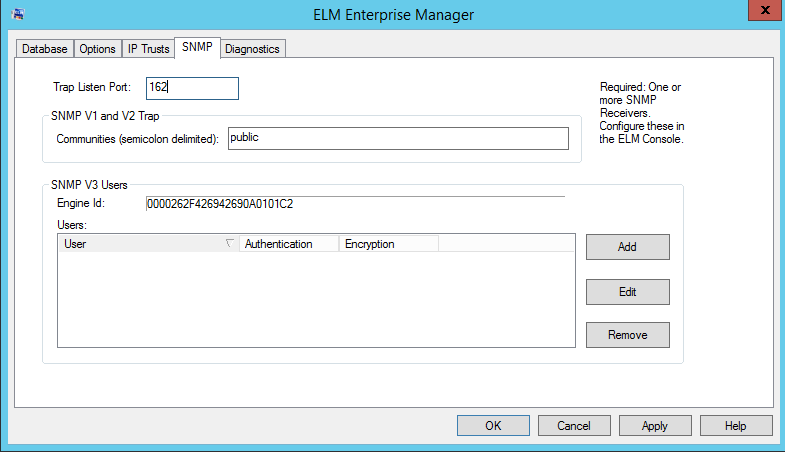
Trap Listen Port: Enter the port number for the ELM server to listen for SNMP traps.
SNMP V1 and V2 Trap: Enter the community names of the traps received that ELM will capture.
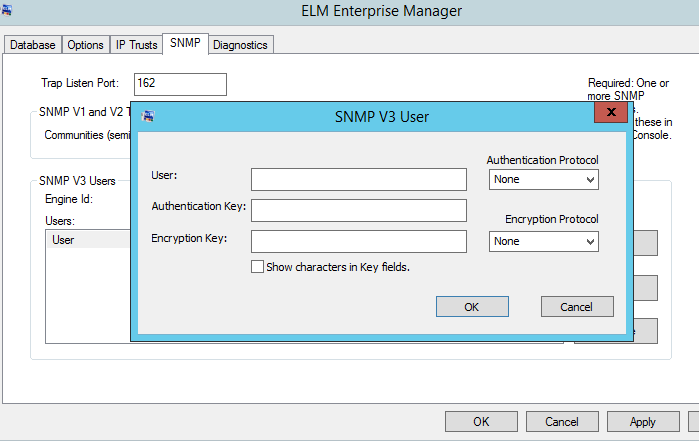
SNMP V3 Users:
After clicking the Add button. Enter the User, Authentication Key and Encryption key for receiving V3 traps.
Diagnostics
The Start Diagnostics button launches the ELM Diagnostics Tool (TNTDiag.exe).
The ELM Diagnostic Tool (TNTDiag) is a troubleshooting tool used to trace some or all activity of an ELM Server, an ELM Console, and/or a Service Agent. The diagnostic output produced by this tool is intended for TNT Software's Product Support Group. This tool adds overhead to the system and should be used only under the direction of TNT Software support personnel.
Beginning with ELM Enterprise Manager version 7.0, continuous diagnostic tracing runs in the background.
Logging
Set the level of logging activity to one of three pre-defined settings. In general the three levels control logging by event type as indicated below.
•Low - Log errors only. •Medium - Log errors and warnings. •High - Log errors, warnings and informational events.
Only events that are written to the Application log respect logging level and logging cannot be completely turned off.
Database
This tab displays current database configuration information. You may click the Database Settings button to configure database settings.
|  Previous
Next
 Previous
Next