|
<< Click to Display Table of Contents >> Navigation: Technical Guide > Viewing and Notifying > Notification Methods >
|
The Forward Event Notification sends event information from one ELM Server (the sending server) to another ELM Server (the receiving server). Use this notification to link one or more ELM Servers. Forwarding events to an upstream ELM Server allows you to create a tiered monitoring system, an industry standard for monitoring multiple locations. Forward Event also has a caching mechanism. If the sending ELM Server cannot deliver the notification, it will cache it and attempt to resend after a few minutes.
Properties
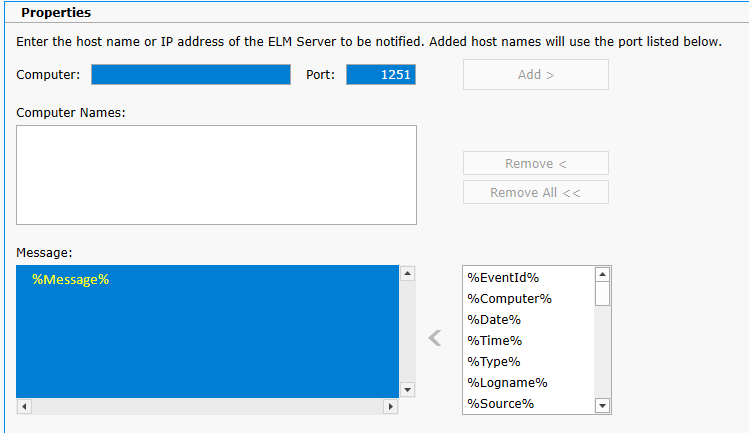
Computer: Specify the name or IP address of the receiving ELM server.
Port: The port on which the receiving ELM Server is listening. By default, ELM Servers listen on port 1251. Set this value before adding a receiving ELM Server name to the list.
Add: Click the Add button to add a server. The Select Computer dialog box will appear. You may enter the server name in the Computer Name field or browse the network and select the server. Click OK to add the server. Repeat this step for each server you wish to add.
Remove: Select an ELM Server in the Names list and click the Remove button to delete it from the list.
Remove All: You may use the Remove All button to remove all ELM Servers from the Names list.
Note
The receiving ELM Server must have the IP address of the sending ELM Server before it will accept forwarded notifications. The IP address is entered in the ELM server Edit document (ELM default is accept all forwarded data). Right-click on ELM server in the Explorer tree and select Edit. Locate the setting called "Accept forwarded data from any ELM server"

Assignments
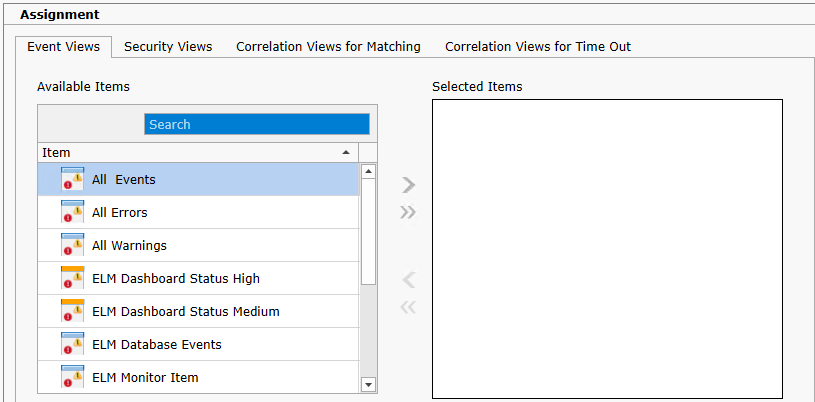
This section allows you to assign the notification to specific Event views. When and event is received and matches one of the views with a notification assigned, it will trigger that notification.

Scheduling
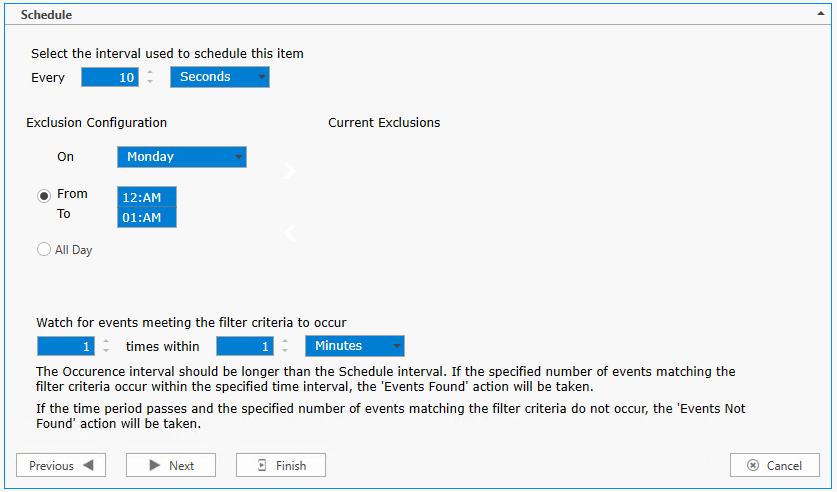
Specify the interval at which the monitoring, polling or action is to occur. Depending on the Monitor Item type, Items can be scheduled in interval increments of Seconds, Minutes, Hours and Days. The Scheduled Interval is relative to the top of the hour or top of the minute. For example, if a Scheduled Interval is configured for 10 minutes, the Monitor Item will execute at hh:10:00, hh:20:00, hh:30:00, hh:40:00, hh:50:00, h1:00:00, etc. If a Scheduled Interval is configured for 15 seconds, the Monitor Item will execute at hh:00:15, hh:00:30, hh:00:45, hh:01:00, hh:01:15, etc.
Exclusion Configuration
Specify day(s) of week when you do not what the scheduled item to run.

Naming
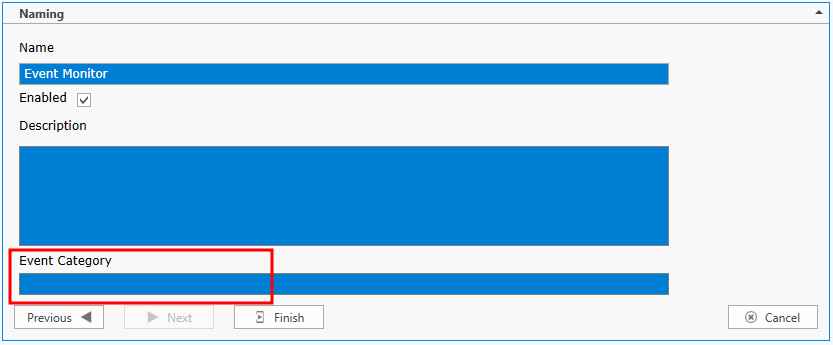
Enter the name of the item and give it a description.
Event Category
This allows you to assign a custom category for the Action event. This custom category may then be used in filtering and notifying later.
Enabled
Use this check box to enable/disable a monitor item.
